ANGULARJS & SLIM MICROFRAMEWORK DEVELOPING A REST-POWERED AJAX TABLE CONTROL (PART 2)
Welcome to the second part of a hands-on tutorial on writing reusable user interface components with AngularJS. In this tutorial, we’ll write a table control that asynchronously loads data from a server, displays it, and allows the user to sort the data by clicking table headers. The sorting is done client-side. We’ll show how to write a REST-server in PHP, how to define custom HTML elements in AngularJS, and how to setup a controller for the elements. To top it off, we’ll write CSS for our table in such a way that it can be dropped into a user interface in a snap, and scales fluidly with the space allotted to it.
The second part of this tutorial focuses on AngularJS. With a RESTful web service in place, we will now set about writing a new HTML element for our dynamic table. Read the first part here.
In the first part of this tutorial, we built a RESTful web service using the Slim Microframework and the Idiorm/Paris object relational mapping libraries. We can now test our web service from the browser, to make sure that all works as it should.
Functional check
Retrieving a list of wines should be possible using the following URL:
http://www.myhost.com/webservice/wineOr, if you’ve not set up URL rewriting on your server, you can use this:
http://www.myhost.com/webservice/webservice.php/wineNot as pretty, but in a testing environment it gets the job done.You can always set up URL rewriting on a production server at a later stage.
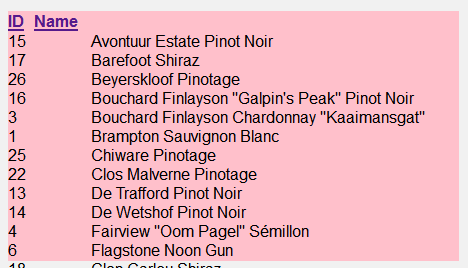
The JSON response should be similar to this:
[
  {"id":"15","name":"Avontuur Estate Pinot Noir"},
  {"id":"17","name":"Barefoot Shiraz"},
  {"id":"26","name":"Beyerskloof Pinotage"},
  {"id":"16","name":"Bouchard Finlayson "Galpin's Peak" Pinot Noir"},
  {"id":"3","name":"Bouchard Finlayson Chardonnay "Kaaimansgat""},
  {"id":"1","name":"Brampton Sauvignon Blanc"},
  {"id":"25","name":"Chiware Pinotage"},
  {"id":"22","name":"Clos Malverne Pinotage"},
  {"id":"13","name":"De Trafford Pinot Noir"},
  {"id":"14","name":"De Wetshof Pinot Noir"}
]
If this doesn’t work, please refer to the first part of this tutorial first.
A new HTML element
We are now getting to the magic part. AngularJS allows us to create new HTML elements, and write code to define the behavior and representation of these elements. Now what we want for our dynamic table is something like this:
<div style="width:500px; height: 250px; background: pink">
  <mytable item="wine">
    <mytablecol title="ID" field="id" width="20%" defsort="up"></mytablecol>
    <mytablecol title="Name" field="name" width="80%" defsort="down"></mytablecol>
  </mytable>
</div>- The
<mytable>element represents a dynamic table. It has a single attribute item, which contains the name of the RESTful web service to access in order to retrieve data for the table. - The
<mytablecol>elements represent columns in the table. Each column has the following attributes:- title – This is the human-readable title that should be displayed in the column header.
- field – This is the name of the field in the JSON data returned by the web service, from which the data for this column should be read.
- width – This value determines the relative width of the table column. We want our tables’ width to be fluid, so percentages are in order.
- defsort – (default sort) If this attribute is present, then the table can be sorted by this column. If it is sorted by this column, then the sort direction should be according to the value of this attribute.
We’d like our table control to be reusable, so it should fit any width and height allotted to it in the user interface. This is why the column widths are expressed in percentages, and in this demo, I’ve made sure to stick the table in a pink <div> element with a set width and height, which we can fiddle with later to see that the table really scales. It’d like this table to be able to live in elements with a fluid width/height, and for it to rescale when the browser is resized.
Setting up AngularJS
AngularJS is a JavaScript library. In order to use it, you can either download it here or link to it through Google’s hosted libraries. I recommend the latter option, as Google has various versions available, including the very latest one. Check out Google Hosted Libraries to see all the other goodies they’ve got.
Here’s a tip: don’t use the minified version of AngularJS unless your web application is already in production. The minified version gives unreadable error messages.
Let’s get started and create a new index.html file for our test application:
<!DOCTYPE html PUBLIC "-//W3C//DTD XHTML 1.0 Strict//EN"
  "http://www.w3.org/TR/xhtml1/DTD/xhtml1-strict.dtd">
<html xmlns="http://www.w3.org/1999/xhtml" lang="en">
  <head>
    <link href="css/style.css" rel="stylesheet" type="text/css" />
    <script src="//ajax.googleapis.com/ajax/libs/angularjs/1.2.14/angular.js"></script>
    <script src="//ajax.googleapis.com/ajax/libs/angularjs/1.2.14/angular-route.js"></script>
  </head>
  <body>
    <h1>Hello!</h1>
    <div style="padding:50px">
      <div style="width:500px; height: 250px; background: pink">
        <mytable item="wine">
          <mytablecol title="ID" field="id" width="20%" defsort="up"></mytablecol>
          <mytablecol title="Name" field="name" width="80%" defsort="down"></mytablecol>
        </mytable>
      </div>
    </div>
  </body>
</html>
Please note the links in the HTML <head> element linking to the angular.js and angular-route.js libraries on Google. Also note that I’ve already stuck in our <mytable> element.
Open index.html in your browser. You get… nothing. Just a pink rectangle, which is our container <div> element. This is normal – the browser is not familiar with the <mytable> and <mytablecol> elements and ignores them. Using AngularJS, we’re going to do something about that.
A new directive
A new HTML element, in AngularJS jargon, is called a directive. In order to define a new directive, we’ll need to create an AngularJS module. To do so, we create a fresh JavaScript file (call it mytable.js) and link to it from our index HTML file.
To the HTML element, make the following change:
<html xmlns="http://www.w3.org/1999/xhtml" lang="en" ng-app="modtable">Also add the following script to the <head> element:
<script src="mytable.js"></script>In mytable.js, place the following code:
angular.module('modtable', [])

  .directive('mytable', function() {
    return {
      restrict: 'E',
      template: 'hello',
      replace: true
    };
  })
Refresh your page. Marvellous! The word “hello” now appears where the <mytable> element is.
What AngularJS does, is this. With the new directive in place, AngularJS starts up as soon as the browser loads the index.html page. It then reads through the page DOM, and when it finds an instance of our <mytable> element, it replaces it with the template defined in the code above.
The following points are of note:
- It is important to place the
ng-appattribute in your<html>element. If you forget this, AngularJS will not run against your page. You can actually place this attribute on a specific<div>element rather than your entire page, but for our demo it makes no difference. If you do, you can determine where AngularJS will replace elements, and where it doesn’t. - All directives that you create must live in an AngularJS module (the one specified in the
ng-appattribute). AngularJS can actually do a lot more than replace elements, and all the other stuff also goes in a module. - A directive is defined as a function. That function must return a JavaScript object with a set of members that define how the directive behaves. In the code above, that’s the
restrict,templateandreplaceattributes. - The restrict attribute indicates whether AngularJS will replace an entire element (E), or just an attribute (A). In our case, we’re replacing the entire
<mytable>element with something else. - The
templateattribute defines what to replace the<mytable>element with (a bit of HTML). If your HTML grows big, you can (and should) place it in a separate HTML file and use thetemplateUrlattribute instead. - The
replaceattribute determines whether AngularJS should replace the<mytable>element entirely (in our case, yes) or whether it should insert the template content as a child of<mytable>.
It’s important to see that even with AngularJS’s intervention, our browser still doesn’t know how to deal with the <mytable> element. It still ignores it. AngularJS merely comes along and replaces the <mytable> element with HTML that the browser does understand.
Accessing Attributes
OK, great. We can use AngularJS to replace elements with other (more complex) HTML. We can place that HTML in a template file for easy editing. But this is all still rather static. Time to dive into AngularJS and make something happen.
A few changes to our JavaScript code:
angular.module('modtable', [])

  .directive('mytable', function() {
    return {
      restrict: 'E',
      scope: { item: '@' },
      template: 'hello {{item}}',
      replace: true
    };
  })
If you refresh your page again, you’ll see that it now says “hello wine“. AngularJS has placed the attribute of our <mytable> element inside the replacement template. This works because:
- We inserted a placeholder in the template:
{{item}} - We added a scope to our directive, with a content of
{ item: ‘@’ }
AngularJS now knows to get the item attribute from the original <mytable> element, add it to the “scope” of our directive, and enable us to use it in our template. Scopes are very important. Without them, AngularJS has no idea where to look for the values that you need.
A child directive
We don’t have just one element to replace, but two: <mytable> and <mytablecol>. In order to access <mytablecol> and its attributes, we’ll need to add a second directive. Add it to your JavaScript code:
.directive('mytablecol', function() {
  return {
    require: '^mytable',
    restrict: 'E',
    transclude: false,
    scope: { title: '@', width: '@', field: '@', defsort: '@' },
    link: function(scope, element, attrs, ctrl) {
      ctrl.addCol(scope);
    },
    template: '',
    replace: true
};
This new directive does not include a template. Rather, it depends on the parent directive to represent it. The parent is identified through the require attribute, which make it clear to AngularJS that <mytablecol> elements should not be replaced when not contained in a <mytable> element. Indeed, they should not occur in the HTML without a <mytable> parent.
For this directive, we make sure that its scope includes all the attributes that a <mytablecol>element can have. Also, whenever AngularJS replaces this element (with nothing, since there is no template) it calls the link method. We define this method to call a method on the parent directive, passing the scope as an argument.
Writing code – adding a controller
So far, our directives are created using pure declaration. We have added no executable code. This will change now, as we implement the addCol method that AngularJS calls whenever it replaces a <mytablecol> child directive.
Add the controller method to the mytable directive:
.directive('mytable', function() {
  return {
    restrict: 'E',
    scope: { item: '@' },
    template: 'hello {{item}}',
    replace: true,
    controller: function($scope, $http) {
      var cols = $scope.cols = [];
      this.addCol = function(col) {
        col.sort = "";
        cols.push(col);
        console.log("add col");
      };
    }
  };
})
We’ve now created a controller. It’s a function that runs in the context of the scope of our <mytable> directive, and makes use of an AngularJS service ($http to be precise – we’ll actually use it later). The controller function gets executed as soon as our directive replaces an element, and it contains all further code we are going to write for this directive.
At this point, we create an empty collection of table columns cols as soon as the directive replaces a <mytable> element, and we define a method addCol which our child directive calls whenever it gets linked. This way, our collection of table columns gets expanded automatically. All columns harvested this way get an attribute “sort” set to the empty string – we’ll use this later to setup sorting.
Refresh your page – you should see some FireBug console messages showing that addCol gets called precisely two times. (If you don’t have FireBug, install it now!)
Getting data from the server
We can now add some more code to our controller. When the controller starts up, we’ll have it request data from the server through AJAX. We don’t actually have to write any of the (tricky) AJAX code ourselves – AngularJS does it all for us. Because our controller uses the $http service, we can write this:
controller: function($scope, $http) {
  var cols = $scope.cols = [];
  this.addCol = function(col) {
    col.sort = "";
    cols.push(col);
  };
  this.getData = function(col)
  {
    $http.get('webservice.php/' + $scope.item).success(function(data) {
      $scope.items = data;
    });
  };
  this.getData();
}
Our AJAX request is started when the controller is created. It requests data from the URL /wine (our REST web service), receives a JSON result, and stores it in $scope.items. These items can be used in a template, which we’ll write next.
As you can see, getting data from the server through an AJAX request is very straightforward.
Writing a template
Although we are already replacing <mytablecol> child elements, storing columns and retrieving data from the server, our output is still a paltry “hello wine”. We’re about to change that.
Rather than placing the HTML that the <mytable> directive must generate directly in the template attribute, we’ll replace it with a templateUrl attribute, which points to an HTML file. This makes it much easier to write the replacement HTML (no single quotes and string concatenation required) and we’ll still be able to use {{placeholders}}.
Let’s create a file “mytable.html” with the following HTML:
<div class="mytable">
  <div class="header">
    <div class="header-inner">
      <table cellspacing="0" cellpadding="0">
        <thead>
          <tr>
            <th ng-repeat="col in cols" style="width:{{col.width}}">
              <a href="">{{col.title}}</a>
            </th>
          </tr>
        </thead>
      </table>
    </div>
  </div>
  <div class="body">
    <table cellspacing="0" cellpadding="0">
      <tbody>
        <tr ng-repeat="item in items">
          <td ng-repeat="col in cols" style="width:{{col.width}}">
            <div>
              {{item[col.field]}}
            </div>
          </td>
        </tr>
      </tbody>
    </table>
  </div>
  <span style="display:none" ng-transclude></span>
</div>
Refreshing our page yields something much more interesting now:
Wonderful! AngularJS has replaced our <mytable> element with a header table (with the correct column names), as well as a body table with the actual table data. It doesn’t look like much yet – because we haven’t styled it – but most of the work is actually already done.
The HTML in this template contains few surprises, except AngularJS-specific instructions:
- Placeholders (attributes in double curly braces) are used to insert data from the directive’s
$scopeinto the template. (We have seen this before). - The
ng-repeatinstructions is used to have AngularJS walk through an array and add each of its element to the template. The instructions works just like PHP’sforeachstatement.
Summary
In this section of our AngularJS tutorial on directives, we’ve created directives for replacing <mytable> and <mytablecol> HTML elements with HTML templates, filling the templates with data retrieved from a RESTful web service through AJAX.
Please continue reading part 3 of this tutorial, where we’ll style our results with CSS and add automatic sorting.